Google are currently working on a Dashboard UI for their Kubernetes orchestration tool. This is still a work in progress and not yet ready for production, however, they aim to have a BETA release end of January and a stable release towards the end of February. We have managed to get this working, ready for the BETA release.
This will replace the current kube-ui.
What you will need (at least):
2 x SD cards loaded with Arch Linux ARM & Kubernetes. (Covered in our previous blog post here)
2 x Raspberry Pi 2 Model B
Preparation
In order to get the Dashboard working, there are a number of software dependencies that need to be installed and configured first.
• Docker 1.3+
• Go 1.5+
• NodeJS 4.2.2+
• NPM 1.3+
• Etcd 2.2+
• Java 7+
• Gulp 3.9+
• Python
• Python2
• Make
• Bower
• GCC
Preparation Installation
Docker should already be installed, and we will be leaving Go till last. I prefer doing this in steps as sometimes mirror connections fail, but there is a single command, shown below the steps.
1. Open a terminal on your Master Kubernetes Node.
2. Log into the root account using su and the root password.
3. Install Node JS and NPM.
pacman -S nodejs npm
4. Install Java 7. When we were testing with the later versions of Java, we ran into issues with compiling the dashboard, therefore we stuck with JDK 7.
pacman -S jd7-openjdk
5. Install Gulp
pacman -S gulp
6. Install Python and Python 2
pacman -S python python2
7. Install Make
pacman -S make
8. Install Bower
pacman -S bower
9. Install GCC
pacman -S gcc
To install all the dependencies in one go, you can use the following command:
pacman –S nodejs npm jdk7-openjdk gulp python python2 make bower gcc
Now, we are going to build Go. At the time of writing, there is not a working version of Go 1.5 for ARMv7, therefore we have to firstly install the older 1.4.3 version from the public repository and then manually build 1.5 on an ARMv7 platform.
1. Clone the “Go” repository.
git clone https://go.googlesource.com/go
2. Change directory to “Go”.
cd go
3. Checkout “Go 1.4.3”.
git checkout go1.4.3
4. Change directory to “src”.
cd src
5. Run the bash script in order to build Go 1.4.3.
./all.bash
6. As Go is installed in our user’s home directory, in order to reference this, we need to add the command “Go” to the user’s $PATH.
nano /home/alarm/.bashrc
and input at the bottom of the file:
export GOROOT=$HOME/go
export PATH=$PATH:$GOROOT/bin
7. Log out and back in to the shell as user “alarm”, not “root”
8. Check that “Go” is installed the version correctly and the $PATH has been setup.
go version
This should display the following:

9. To check that “Go” is now installed and working correctly, we created a simple “Hello, World” script:
nano helloWorld.go
and pasted this into the file:
package main
import “fmt”
func main() {
fmt.Printf(“hello, world\n”)
}
save and exit.
10. Run the file.
go run helloWorld.go
This should return the following:

If this is not displayed and you receive an error saying “Go not found”, go back and ensure that “Go” has been added to your $PATH variable.
11. Now that we have “Go 1.4.3” installed, we now have to upgrade to “Go 1.5” for the Kubernetes Dashboard. You can do this the long way round by creating your own bootstrap, which you need another machine for, or thanks to the work of Dave Cheney, he has already published a public bootstrap for ARM on his website which we will be using. To use Dave Cheney’s bootstrap, you can either run the below commands one by one, or alternatively create a script to run them by doing the following:
nano upgradeGo
and paste this script into the file:
#!/bin/bash
cd $HOME
curl http://dave.cheney.net/paste/go-linux-arm-bootstrap-c788a8e.tbz | tar xj
curl https://storage.googleapis.com/golang/go1.5.src.tar.gz | tar xz
ulimit -s 1024 # set the thread stack limit to 1mb
ulimit -s # check that it worked
cd $HOME/go/src
env GO_TEST_TIMEOUT_SCALE=10 GOROOT_BOOTSTRAP=$HOME/go-linux-arm-bootstrap ./all.bash
12. Save the script and give it execute permissions
chmod +x upgradeGo
13. Run the script as root. Be aware, this does take a while to run and there are times when no updates are being displayed. It may also fail on the tests but running /root/go/bin/go version should show return “go version go1.5 linux/arm” once complete.
./upgradeGo
14. As we ran the upgrade Go script as root, we now need to move it from the root folder it was built in, to the alarm home folder.
Firstly, we have to remove the 1.4.3 Go directory from the home directory of alarm.
rm -rf /home/alarm/go
then, we move the folder from root/go to alarm/go
mv /root/go /home/alarm/go
Finally, to check that the folder has moved correctly:
ls /home/alarm/go
If the folder has been moved correctly, it should display the following:

Log out of the root account.
15. In order to see if it is still running correctly, test go again using the file we created earlier.
go run helloWorld.go
16. Also, recheck the Go version to ensure it returns that it is now version 1.5
go version
With the full preparation done, we moved onto building the Kubernetes Dashboard.
Building the Dashboard
1. For security reasons, the dashboard should be run as a standard user, not as root. Therefore, as alarm, we start by cloning the latest Git release for Kubernetes Dashboard
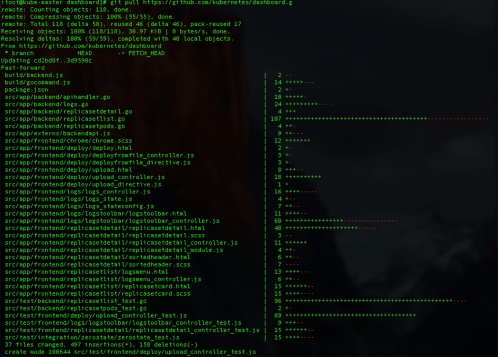
git clone https://github.com/kubernetes/dashboard.git
2. Change to the dashboard directory
cd dashboard
3. Install the dashboard packages. This takes around 3 hours and requires the terminal to stay active throughout the process. If the terminal becomes inactive or a remote shell is lost, you will have to restart the process. Fortunately, it will continue from where it stopped. You may however get an error stating that “node sass” cannot be downloaded. If you receive this error, follow the below steps to manually download it once the main install has finished.
npm install
4. Optional: Install node sass if you received the above mentioned error. This can take up to 15 minutes.
npm install node-sass
5. Log in as root and install bower. This has to be done as root, but once you have installed bower, remember to exit the superuser.
bower install –allow-root
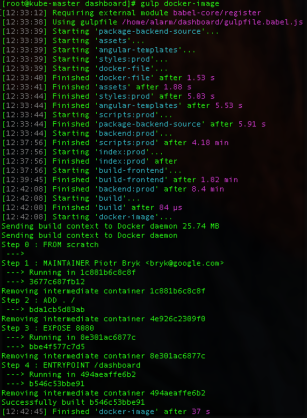
6. Now ready to run the dashboard. To launch the dashboard:
gulp serve
Remember, this should be done in a standard user account.
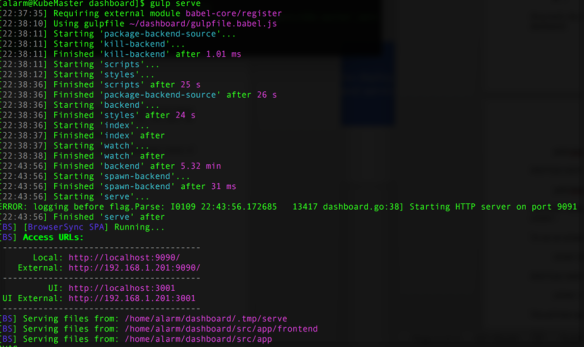
7. You can see that this is up and running, as our screenshot displays the access URL’s. To view it in a browser, simply open your web browser and go to your Pi’s IP address, as shown in your terminal. In our case above, our IP Address is listed as http://192.168.1.201:9090 but yours may vary. This will show the test/debug version of the Kubernetes dashboard.
You can access the debugging console by going to the UI address listed in the terminal. In our case, this was http://192.168.1.201:3001
8. To remove the debugging console and run a production version of Kubernetes dashboard:
gulp build
9. Once this is built, it is placed in the dist folder. To run the production version of Kubernetes dashboard:
gulp serve:prod
10. Open your web browser and go to your Pi’s IP address. Again, this will vary, ours was http://192.168.1.201:9090 so check the output in the terminal window to find the IP Address if you are unsure.
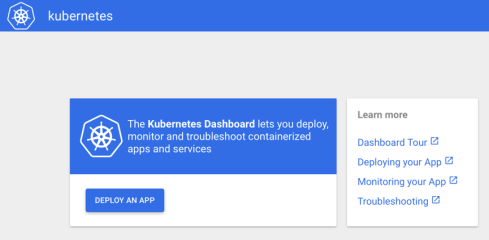
Kubernetes dashboard should now be up and running.
At present the Kubernetes dashboard requires an active terminal to be able to run, in order to bypass this, we used “Screen”, which runs a detached non-active terminal in the background, which means we didn’t need a running active terminal.
1. Install Screen
pacman –Sy screen
2. Open the dashboard directory
cd dashboard
3. Run screen
screen -fa -d -m gulp serve:prod
This will run in the background.
4. To see the process
screen –r
This will show either the detached terminal you are using to run the Kubernetes Dashboard, or it will list all the running screen processes. To reattach a specific screen process, you will need to include the screen ID produced from the above command.
To detach from the screen and leave it running, press: ctrl + a + d
To completely end the process and stop the dashboard from running, use: ctrl + x on the running screen terminal.
Quick recap:
At present, the dashboard is still a work in production. Some links may not work, and is limited functonality at the time of writing this post. Keep your eye on the Kubernetes Dashboard project on github for further releases.